Login and Logout
If you have been given rights to use the OCR Editor, you will have received an email concerning your username and password.
Go to http://ocrui-kk.lib.helsinki.fi/
Click "log in" in upper right corner. You will be asked for your username ("email") and password ("password"). Fill in the fields and click "login".
To log out, click "Log out" in the upper right corner. (You must first exit the actual editing view, see ...XXX)
Problems in login
If the username or password is invalid, you get an error message, "Invalid login credentials". Check your username and password, and try again.
If you have forgotten the username and/or the password, please contact the administrator.
If you suspect that your username and password have ended in wrong hands, please contact the administrator immediately.
Collection View
After login, you will be on the "Welcome to OCRUI" page.
Here you can see, what materials can be edited by the OCR editor. There are collections and sub-ciollections. Click the name of the collection to open it, until you get a list of works.
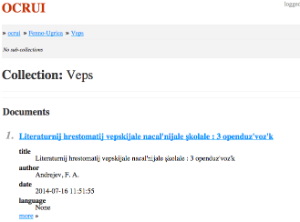
Click the title of a work to see its detailed inforomation. If you have rights to edit it, you will also see the blue "Edit OCR text" button. Click it to start editing.

Different users may have rights to different works. If the blue Edit button is not there, you have not rights to edit this particular work. If you think you should have been given the rights, please contact the administrator.
Editing View
The editor view has four main areas.
1) The work to be edited as image.
2) Text of the work that you will be editing.
3) Toolbar
4) Language selection and keyboard (here hidden, as they are by default).

Navigation in the work
![]()
Left arrow = previous page. Right arrow = next page.
White number: current page. You can type in the number of the page you want to go to and hit Enter.
Gray number: pages total.
Saving the Changes
![]() Save the changes you have made to the text by clicking the Save button. The button is orange when there are unsaved changes, otherwise it is gray. Save your work often!
Save the changes you have made to the text by clicking the Save button. The button is orange when there are unsaved changes, otherwise it is gray. Save your work often!
![]() Click this button to download the text of the open page as an ALTO XML file.
Click this button to download the text of the open page as an ALTO XML file.
Exiting the Editing View
 Click this button to go back to the Collection View. To log in entirely, first exit the Editing View and then click Log out. Note that the editor will not ask if you have unsaved changes.
Zooming and Moving on a Page
![]()
The magnifying glasses (+ and -) zoom in and out in the image. The third button is for moving the image. Click the button. Move mouse to the image, press the mouse button and drag the image. (In many computers you can drag always without having to push the button. Also zooming may be possible using the computer's controls like mouse or trackpad.
If the text is too small or large, use the browser's controls to adjust it.
Settings of the Editing View
![]() Higlighting of focus: As default, clickin on a word in the image, it will be highlithed in the image and in the text. Likewise clicking a word in the text will highlight it in both the text and the image. You may toggle this highlighting on and off by clicking the "A" button.
Higlighting of focus: As default, clickin on a word in the image, it will be highlithed in the image and in the text. Likewise clicking a word in the text will highlight it in both the text and the image. You may toggle this highlighting on and off by clicking the "A" button.
Note: extensive adding or removing text may dislocate the highlighting in the image to some extent. This is nothing to worry about.
![]() Layout: with this button you may toggle between vertical and horizontal layout.
Layout: with this button you may toggle between vertical and horizontal layout.
![]() Wrapping: When selected, the lines of text are wrapped as in the image. Otherwise the lines will be as long as the text window allows. Toggle between options by clicking the button.
Wrapping: When selected, the lines of text are wrapped as in the image. Otherwise the lines will be as long as the text window allows. Toggle between options by clicking the button.
![]() Highlight unsaved changes. Any unsaved edits are shown in colour, until you save your work. Toggle on or off by clicking the button.
Highlight unsaved changes. Any unsaved edits are shown in colour, until you save your work. Toggle on or off by clicking the button.
![]() Highlight all changes to the original, that is, all changes by all editors at all times. Toggle on or off by clicking the button.
Highlight all changes to the original, that is, all changes by all editors at all times. Toggle on or off by clicking the button.
Text editing
Editing the text is done as in any normal text editor. Take the cursor to the place in text you want to edit, and click. You can select and remove text using mouse and keyboard, and you can type in new text.
Note: do not attempt to make the text imitate the exact layout of the image. In other words, please do not use space key, enter key, tab key, etc. in order to position the text.
Text can be copypasted from e.g. a text editor, too.
Note: there may be additional policies on how to exactly do the editing. They vary form project to project. Please remember those instructions when using the OCR Editor.
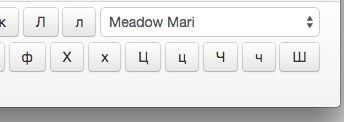
Language Annotation
Annotating a word: Go to the word; it is enough that the cursor is in the word, it does not need to be selected. From lower right corner, click open the language menu. Select the right language. (The character menu of this language will appear.)
 -->
--> -->
-->
You can also make a bigger selection of words, up to all text on one page. If there is a predominant language, first select all text and mark it as being in that language. Then you can change the annotation for individual words in another language.
Special Characters
Many special characters are difficult to produce on keyboard. You can easily add special characters from the character menu. First you must annotate the language of the text, in order to see the right character selection. Type a character by clicking it in the menu.
Special characters – and anyt text – may be copypasted from e.g. a text editor.
Tagging
 You may add tags to words. Go to the word. Click the Tag button, write or comment, and save. Note: saved tags cannot be removed.
The primary purpose of tags is to convey messages to them that supervise the editing project. Projects have different policies on how to use the tag function. Please use it as instructed.